- Home
- How To Dehydrate Pork
How to Dehydrate Pork
The Other White Meat!
Step-by-Step Guide to Dehydrating Pork
Dehydrating pork, including bacon, is a safe, straightforward, and effective way to preserve its nutritional value and extend its shelf life.
Whether you’re preparing for camping adventures, stocking up on emergency supplies, or simply looking for a nutritious snack, dried pork is an excellent protein-packed option.
Why Choose Dried Pork?
Dehydrated pork not only retains its rich flavor and high protein content but also becomes lightweight and easy to carry—perfect for outdoor trips or on-the-go snacking.
Plus, it eliminates the need for refrigeration, helping you save storage space and reduce food waste.
Its versatility and convenience make it a must-have addition to your pantry or backpack.
Click the two links for how to dehydrate bacon and make Bacon Jerky too! You'll remain on this page.
Selecting the Right Cuts for Dehydration
There are many different cuts of pork that are suitable for drying in a dehydrator (or a regular oven). Some of the most popular cuts include pork loin, chops, tenderloin, and belly.
Pork loin is a lean cut of meat, ideal for dehydrating. Its small amount of fat helps keep the meat moist during drying.
Pork chops are another lean cut of pork that is perfect for dehydration. They have a little more fat than pork loin, but not enough to make them difficult to dry.
Pork Cuts Explained: Loin, Chops, Tenderloin, and Belly –
What You Need to Know
Pork Loin
- Location: Comes from the back of the pig, running along either side of the backbone.
- Size: A large, whole roast often sold boneless but sometimes bone-in.
- Texture: Lean and slightly firm, with a thin fat cap for added moisture during cooking.
- Appearance: Broad and rectangular, ideal for slicing into steaks or roasts.
- Cooking Methods: Best for roasting, grilling, or slow cooking.
- Dehydration Suitability: Excellent, as it is lean. Must be trimmed of fat and sliced thin for even drying.
Pork Chops
- Location: Cut from the pork loin, making them essentially smaller slices of the loin.
- Size: Varies, depending on thickness and whether they’re bone-in or boneless. Generally portioned as single-serving cuts.
- Texture: Lean and tender, though the texture can vary depending on the type:
Rib Chops: Slightly more marbled, with a small bone.
Loin Chops: Lean and often include a T-bone with tenderloin and loin sections.
Blade Chops: More fatty and flavorful, cut from the shoulder end. - Appearance: Small, flat cuts, either with a bone (bone-in) or without (boneless).
- Cooking Methods: Grilling, pan-searing, baking, or broiling. Quick-cooking but can dry out if overcooked.
- Dehydration Suitability: Good for lean chops (like loin chops), if trimmed and sliced thin.
Pork Tenderloin
- Location: A specific muscle that runs along the spine, near the rear of the pig.
- Size: Long, narrow, and cylindrical; much smaller than the loin.
- Texture: Extremely tender and lean, as it’s a muscle that doesn’t get much exercise.
- Appearance: Thin and elongated, often sold whole.
- Cooking Methods: Perfect for quick-cooking methods like roasting, grilling, or pan-searing.
- Dehydration Suitability: Ideal for dehydration due to its uniform leanness and small size.
Pork Belly
- Location: Comes from the underside (belly) of the pig.
- Size: Large, rectangular slabs with distinct layers of fat and meat.
- Texture: Very fatty, with alternating layers of fat and meat. It’s rich, juicy, and flavorful.
- Appearance: Thick and rectangular with visible marbling of fat and meat.
- Cooking Methods: Best for slow cooking, braising, roasting, or curing (e.g., bacon or pancetta). Fat renders beautifully in long cooking processes.
- Dehydration Suitability: Not ideal due to its high fat content, which can spoil or turn rancid.
Preparing Pork: Cutting Tips
Cutting the pork is easier when you cut against the grain into thin strips because you're cutting through the muscle fibers, in effect shortening them. Doing so makes it less chewy and tough-tasting which is a desired outcome for pork jerky (or dehydrated meat in general).
Also consider using an electric meat slicer. This way you'll get uniform thickness in your slices so they'll dehydrate at the same rate!
Season Pork Before Dehydrating
Season your pork, season it! It enhances taste, especially when making jerky...
Seasoning before drying is better because the seasoning can penetrate the meat as it dehydrates! This creates a more uniform flavor in the pork strips.
Use a DRY rub OR marinate the pork. See my marinade recipe coming up!
Try These Tasty Dry Rub Combos
- Savory: Salt, pepper, garlic powder, onion powder, smoked paprika.
- Sweet: Brown sugar, cinnamon, nutmeg, and a touch of ground ginger.
- Spicy: Cayenne, chili flakes, or hot sauce in a marinade
How to Make a Marinade
Marinate the strips of pork before drying to make it a more flavorful jerky. Suggested marinating time: three to five days, covered, in the refrigerator.
Try this marinade:
- ⅓ cup Worcestershire sauce
- ⅓ cup Soy Sauce
- ¼ cup brown sugar
- 2 tablespoons Chili paste
- 3 cloves garlic crushed
For a sweet Marinade, try:
- Brown sugar
- Honey, or maple syrup (use sparingly to avoid stickiness)
Don't forget to pat the pork strips dry after a wet marinade with paper towels to remove excess moisture BEFORE placing on your dehydrator trays.
How to Dehydrate Pork
If you're preserving pork, Tenderloin is the top choice, followed by Loin or trimmed Chops. Avoid Pork Belly due to its high fat content which can lead to rancidity. Ugh.
Here's how to dehydrate pork safely:
1. Prepare the Pork
- Select a lean cut of pork, such as tenderloin or loin.
- Trim off any visible fat, as fat does not dehydrate well and can lead to spoilage.
- Slice the pork into thin strips, about 1/8 to 1/4 inch thick, for quicker and
more even dehydration. For ease, partially freeze the pork before
slicing.
2. Preheat the Dehydrator
- Set your dehydrator to 165°F (74°C) to ensure the pork reaches a safe internal temperature during the dehydration process.
3. Dehydrate the Pork
- Arrange the pork strips in a single layer on the dehydrator trays, ensuring they
don’t overlap for proper air circulation.
- Dehydrate for 4-6 hours, or
until the pork is completely dry and breaks easily when bent.
- Properly
dehydrated pork should not feel tacky or moist.
4. Check for Doneness and Safety
- The pork should reach an internal temperature of 160°F (71°C) to ensure all
bacteria are eliminated. Use a meat thermometer to be sure.
5. Store the Dehydrated Pork
- Allow the dehydrated pork to cool completely before storing.
- Transfer to an airtight container or vacuum-sealed bag.
- Store in a cool, dark place. For long-term storage, refrigerate or freeze the dehydrated pork. My preferred method: Use food vacuum-sealer bags!
Or Season After Dehydrating
The reason for seasoning after dehydration, though, is chiefly to enhance the flavor/taste. Dry seasoning works best after drying, (i.e. better than a liquid seasoning - post-dehydration).
Also bear in mind that after drying, the seasonings might not stick as well to the pork. Plus, the flavors can't penetrate as deeply as seasoning before drying. Makes sense, right?
How to Dehydrate Pork Using a Regular Oven
To dehydrate pork in a regular oven, start by preheating the oven to its lowest setting. Then, place the pork on a wire rack and set it inside the oven. Leave the door open slightly to allow air to circulate.
TIP: Use the handle of a wooden spoon to prop the oven door open.
Check on the pork every few hours, and remove it from the oven when it is dried to the "crispy stage."
Keep in mind that it will take longer to dehydrate pork in a regular oven, so you'll need to be patient. And please remember this: We are NOT dehydrating RAW pork. We are using cooked pork.
Safety Note: Raw vs. Cooked Pork
USE COOKED PORK: Why It's Safer...
Cooked pork is safer because it eliminates the risk of ingesting harmful bacteria, such as Trichinella spiralis or Salmonella that may be present in raw pork.
Cooking the pork ensures that it has already reached the recommended internal temperature of 145°F (63°C) or higher before the dehydration process begins, effectively neutralizing these risks.
BEAR IN MIND: If you choose to dehydrate raw pork, extra precautions are necessary to ensure safety. The pork must either be preheated to an internal temperature of 160°F (71°C) before dehydration, or your oven or dehydrator must maintain a consistent temperature of 165°F (74°C) throughout the entire drying process.
These steps are essential to destroy harmful pathogens and make the dehydrated pork safe for consumption.
Rehydrating Pork
You need to rehydrate pork when you want to restore its tenderness and flavor for cooking or eating.
Place the dehydrated pork in a bowl or pot and cover it with liquid. You can use plain water, broth, or even a marinade for added flavor!
Let the pork soak for 15–30 minutes, stirring occasionally to ensure even absorption. For thicker or drier pieces, soaking for up to an hour may be necessary.
If you’re cooking soups or stews with your dried pork, you can skip the soaking step and add it directly to the dish so that the cooking liquid rehydrates it naturally.
Be sure to use your rehydrated pork immediately, or store it in the fridge for up to 2–3 days.
Storing and Using Dehydrated Pork
If you want to store your dried pork for long-term, use food vacuum-sealer bags with oxygen absorbers. Read more about storing food here.
After rehydrating, use it in:
- pasta dishes
- rice dishes
- salads
- tacos or wraps
- breakfast hash
- DIY trail mix
- pizza toppings
- stir-fries
- savory pies
- scrambled eggs or omelets
- stuffing or stuffed vegetables
- chowders
- savory pancakes or waffles
- shepherd’s pie
- ramen or noodle soups
Can You Dehydrate Bacon?
Bacon is a good option for dehydrating because it is pretty lean (depending on which brand you pick). There is no need to remove any fat before drying, and the process actually helps to render out some of the fat from the bacon.
Cut the bacon into strips. Dehydrate bacon at 145°F for four to six hours, or until it is dry and brittle. Store in an airtight container for later use. Jeez, now I want to eat a bacon sandwich...
Use our Fahrenheit to Celsius converter here on our site!
Does Dehydrating Bacon Mess up a Dehydrator?
No, not if you do it right. We know that frying bacon in a pan can give you splattered hands and arms, but we're not frying the bacon - just drying the bacon!
Drying pork products is easy and bacon is no exception. Pork fat renders at a lower temperature than beef fat, so it's important to keep an eye on the process, though.
If bacon is left on the dehydrator too long, it will become hard and brittle. But if that's what you're aiming for to make "crumbled" bacon for pizza toppings and the like, then "go for it!"
Tips for Dehydrating Bacon
- Cut the bacon into strips before drying (already done, if bought in the store!) This will help it render evenly.
- Put the bacon on a wire rack so that air can circulate properly on top and below it. This will help it dehydrate more evenly.
- Dehydrate at a lower temperature than you would beef. Pork fat renders at a lower temperature than beef.
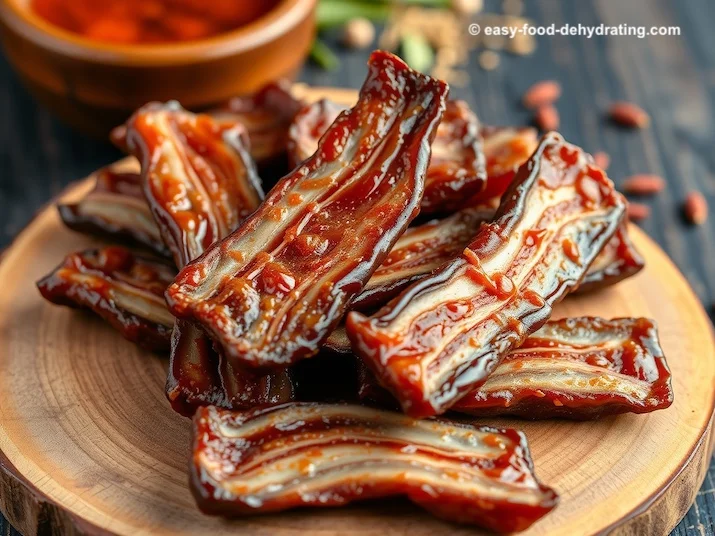
Easy Bacon Jerky Recipe
Ingredients:
- 1 pound thick-cut bacon
- 1/4 cup brown sugar
- 1 tablespoon smoked paprika
- 1 teaspoon black pepper
Instructions:
- Preheat your dehydrator to 165°F.
- Cut the bacon strips into 1-inch pieces.
- In a bowl, mix the brown sugar, smoked paprika, and black pepper.
- Toss the bacon pieces in the spice mixture until it's evenly coated.
- Arrange the bacon pieces on the dehydrator trays, make sure they don't overlap.
- Dehydrate for 4-6 hours, or until the bacon is crispy and dark in color. The time may vary depending on your dehydrator and the thickness of the bacon, of course.
- Remove the bacon jerky from the dehydrator and allow it cool down completely.
- Store the room temperature bacon jerky in an airtight container such as food vacuum sealer bags, or Mason jars for months, or in a Ziploc bag in the refrigerator for up to a month.
Use our Fahrenheit to Celsius converter here on our site!
Enjoy your homemade bacon jerky as a savory snack!
Tip: Use uncured bacon for this recipe to avoid excessive saltiness in the final product. Having said that, it's totally OK to use regular bacon we buy in packs at the grocery store.
Frequently Asked Questions:
Here is an effective method for making your own crispy dehydrated pork rinds at home:
Ingredients:
- 1 lb pork skin/rind, skin removed, cut into 2-inch pieces
- 2 teaspoons of salt
Instructions:
- Using a very sharp knife, slice pork rind into 2-inch portions. Pat extremely dry with paper towels. Season all sides with salt.
- Arrange pork rinds in a single layer, without overlapping, on dehydrator trays lined with parchment paper.
- Dehydrate at 160°F for 6-10 hours until pork rinds are completely dried out and hardened.
- To
test for doneness, pork rinds should feel very lightweight and stiff.
When fully dried, they will snap crisply rather than bend.
- Turn dehydrator off and allow to completely cool before removing pork rinds. Crispiness will set as they cool.
Use our Fahrenheit to Celsius converter here on our site!
Store
cooled pork rinds in an airtight container for up to 2 weeks. Re-crisp
under oven broiler for 1-2 minutes if needed before serving.
Be patient, drying pork rind fully takes time but provides incredible home-seasoned cracklings for snacking!
Here is a tasty pork jerky recipe you can easily make at home:
Ingredients:
- 2 lbs lean pork loin or tenderloin, sliced 1⁄4 inch thick
- 1⁄4 cup soy sauce
- 3 tbsp brown sugar
- 3 garlic cloves, minced
- 2 tsp paprika
- 1 tsp ground black pepper
- 1⁄2 tsp cayenne pepper (optional)
Instructions:
- In
a large bowl or resealable bag, mix soy sauce, brown sugar, garlic,
paprika, black pepper and optional cayenne until combined to make
marinade.
- Add sliced pork and mix well to coat all pieces evenly. Cover and refrigerate 1-2 hours.
- Arrange
pork slices close together but not overlapping on dehydrator racks.
Dehydrate at 145°F for 7-8 hours, flipping halfway through.
- Pork jerky is finished when slices are darkened, shrunken down slightly, dried through fully yet still tender enough to bite.
- Let cool completely before storing jerky in a sealed container for up to 2 weeks. Enjoy as high protein snack!
Use our Fahrenheit to Celsius converter here on our site!
This
combines a sweet and mildly spicy flavor profile for irresistible
homemade jerky without the nasty ingredients found in store-bought
versions. Adjust spice level to your preference!
If you enjoyed this pork and bacon page, share it with your buddies! Thanks.
Don't forget to get your free "Six Simple Steps" eBook where I share how to dehydrate food safely!
You Might Like These
How to Dehydrate Beef: Use pre-cooked, pre-sliced roast beef - or make jerky from raw meat!
How To Dehydrate Turkey: Use pre-cooked, pre-sliced turkey or leftovers! Tasty "Turkey Risotto" recipe included!
How To Dehydrate Meat: Learn how to safely dehydrate cooked meats and get our free beef jerky recipe!
How to Dehydrate Chicken: It's easy - use pre-cooked, pre-sliced chicken breast! Tips on using leftover chicken too.
How To Dehydrate Seafood: Salmon, shrimp, and tuna. Learn how to safely dehydrate fatty fish and lean fish.
How to Easily Dehydrate Nuts and Seeds: A Healthy Way to Preserve Your Favorite Nuts
Before You Go...
If you like the content, please give me some love by clicking on the 🩷 in the lower right hand corner (on just about all my pages). This signals to me that you find it enjoyable and useful. Thank you so much!