- Home
- Food Preservation Techniques: 6 Easy, Effective Methods
6 Essential Food Preservation Techniques for a More Self-Sufficient Life

Susan Gast, Author
Blogger at Easy Food Dehydrating | A New Sober You | Bored Boomers | Beesville Books
Learning essential food preservation techniques is one of the smartest ways to save money, reduce waste, and improve food security at home.
Whether you're building a self-sufficient pantry or prepping for emergencies, these six methods will help you store food safely and sustainably.
 Home canning in a kitchen
Whether you grow your own food, stock up in bulk, or just want to waste less, learning how to preserve what you’ve got is smart. These time-tested techniques aren’t just for emergencies — they’ll save you money, reduce waste, and give you peace of mind.
Let’s walk through the main ways to preserve food at home and see how they can fit into your everyday routine — no homesteading required.
What Is Food Preservation and Why Does It Matter?
Definition and Importance
What is food preservation? Food preservation means keeping food safe and fresh for a long time. This helps you store extra food, reduce waste, and always have something to eat.
Why is it important for sustainability and self-sufficiency? Preserving food helps you waste less and shop less often. It also means you can rely on your own food supply, especially during emergencies. These emergencies can take various forms:
- Natural disasters: Hurricanes, floods, earthquakes, or severe storms can disrupt food supply chains and make accessing fresh food difficult.
- Power outages: Extended blackouts can cause refrigerated and frozen foods to spoil quickly.
- Economic crises: Job loss, economic downturns, or sudden inflation can make it challenging to afford fresh food regularly.
- Supply chain disruptions: As seen during the COVID-19 pandemic, unexpected events can lead to food shortages or limited access to grocery stores.
- Personal emergencies: Injury, illness, or unexpected financial setbacks might temporarily prevent regular shopping trips.
- Seasonal scarcity: In some areas, certain foods may be unavailable or expensive during off-seasons.
- Transportation issues: Car breakdowns, fuel shortages, or public transit disruptions could hinder your ability to reach food sources.
By preserving food, you create a buffer against these potential emergencies, ensuring you have access to nutritious food even when external circumstances are challenging. This practice not only promotes self-sufficiency but also contributes to overall household resilience and food security.

6 Proven Methods of Preserving Food at Home
Overview of Different Methods:
- Canning: Sealing food in jars and heating them to kill germs.
- Freezing: Keeping food at very low temperatures to stop bacteria.
- Drying: Removing water from food to stop bacteria, yeast, and mold.
- Fermenting: Using good bacteria to turn sugars into acids, preserving the food.
- Pickling: Soaking food in vinegar or salty water to preserve and flavor it.
- Smoking: Using smoke to flavor and preserve food.
Pros and Cons of Each Preservation Technique
CANNING
FREEZING
DRYING
FERMENTING
PICKLING
SMOKING
Pros and Cons of Each Preservation Technique
CANNING
FREEZING
DRYING
FERMENTING
PICKLING
SMOKING
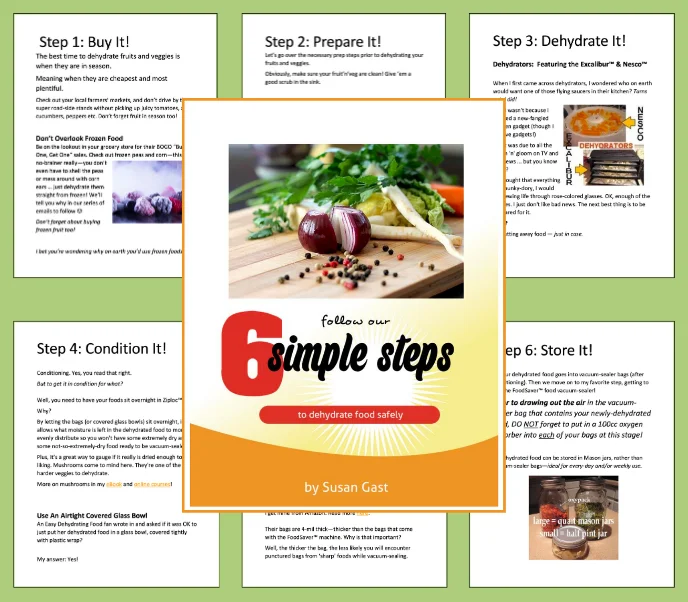
Free eBook: Learn Safe Food Dehydration at Home
To better understand why we dehydrate food and the food dehydration process itself, download my free Six Simple Steps eBook today - simply click the link or the image.
The free eBook covers the necessary steps to safely dehydrate fruit, vegetables, and (cooked) meats!
And while you're downloading the Six Simple Steps, also treat yourself to our "How to Grow & Dehydrate Herbs" too! Click here to visit the free Herb Book page.
It's a "thank you" gift for visiting this Easy Food Dehydrating website and trusting me with your email addy!
How to Can Food Safely (Water Bath + Pressure Canning)
What Is Canning and Why Is It Still Popular?
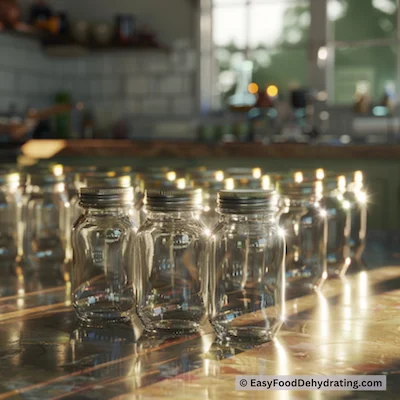
What is canning? Canning is sealing food in jars and heating them to kill germs. This keeps the food safe and fresh for a long time.
Historical context and modern relevance: Canning started in the early 1800s to provide safe food for soldiers. Today, it's still popular for preserving seasonal produce and homemade meals.
Water Bath vs. Pressure Canning: What’s the Difference?
Water bath canning: Good for high-acid foods like fruits and pickles. It involves boiling jars in water.
Pressure canning: Needed for low-acid foods like vegetables and meats. It uses a pressure canner to reach higher temperatures.
Step-by-Step Canning Instructions for Beginners
Detailed instructions for both water bath and pressure canning:
Water Bath Canning:
- Sterilize jars and lids.
- Prepare the food and fill jars, leaving some space at the top.
- Remove air bubbles and wipe jar rims.
- Place lids and screw bands on jars.
- Submerge jars in boiling water, making sure they are covered by at least an inch of water.
- Boil for the recommended time.
- Remove jars and let them cool for 12-24 hours.
Pressure Canning:
- Sterilize jars and lids.
- Prepare the food and fill jars, leaving some space at the top.
- Remove air bubbles and wipe jar rims.
- Place lids and screw bands on jars.
- Place jars in the pressure canner with the recommended amount of water.
- Lock the lid and heat the canner, letting steam escape for 10 minutes.
- Close the vent and bring the canner to the required pressure.
- Process for the recommended time.
- Let the canner cool and depressurize before opening.
- Remove jars and let them cool for 12-24 hours.
Canning Safety Tips: Avoid These Common Mistakes:
- Always use tested recipes and follow instructions.
- Sterilize jars and lids to prevent contamination.
- Don't overfill jars to avoid spillage and bad seals.
- Check seals after cooling and refrigerate any unsealed jars.
Trusted Canning Guides and Resources:
Mason Jars Regular Mouth Quart Jars
- Ball brand regular mouth Glass Mason Jars. Quart size (32oz)
- Package of 12
Mason Jars Wide Mouth Pint Jars
- Ball brand wide mouth Glass Mason Jars. Pint size (16oz)
- Package of 12
Mason Jars Wide Mouth Half Pint Jars
- Ball brand wide mouth Glass Mason Jars. Half-Pint (8oz)
- Package of 12
As an Amazon Associate, I earn commission from qualifying purchases. The price you pay does not increase. Read disclosure here.
How to Freeze Food the Right Way

Why Freezing Food Helps Preserve Freshness
Benefits of freezing food: Freezing is easy and keeps food tasting fresh. It helps you store seasonal produce, bulk buys, and leftovers, reducing waste.
Types of foods suitable for freezing: Most foods can be frozen, like fruits, vegetables, meats, seafood, dairy, and prepared meals. Some foods, like lettuce, don't freeze well.
Having noted that seafood can be frozen, it's best not to do that IF you are thinking of dehydrating it later. Here's why in my third FAQ point. Go read it then come on back!
Freezing Tips: Blanching, Packing & Storage
Blanching vegetables before freezing: Blanching means boiling vegetables briefly and then cooling them in ice water. This keeps their color, texture, and nutrients.
Proper packaging and storage tips:
- Use airtight containers or freezer bags to prevent freezer burn.
- Label packages with the date and contents.
- Arrange items in a single layer to freeze quickly.
- Keep the freezer at 0°F or lower.
💡 Tip: Outside the U.S.? Most dehydrating temps here are listed in Fahrenheit — use our quick converter to see the Celsius equivalent for your machine.
How to Thaw Frozen Food Safely
Safe thawing methods: Thaw frozen foods in the fridge, under cold water, or in the microwave. Don't thaw at room temperature to avoid bacteria.
Best practices for using frozen foods: Use frozen foods within their recommended times for best quality. Add them to recipes directly from the freezer or after thawing.
FoodSaver Food Vacuum Sealer V2244
Excellent value FoodSaver food vacuum sealer - V2244 machine for food preservation with bags and rolls starter kit.
- Touted as the Number 1 food vacuum sealer system!
- Compact and Easy Clean
- UL Safe, Single, Black
Here's where to get this great deal on Amazon:
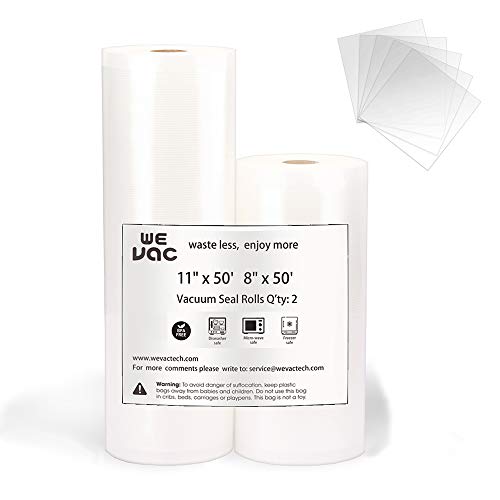
Wevac Vacuum Sealer Rolls
Wevac Vacuum Sealer Rolls - make your own size bag using these 8" x 50' and 11" x 50' roll 2-pack for Food Saver, Seal a Meal, or Weston. Commercial Grade, BPA Free, Heavy Duty,
Great for food vacuum storage, meal prep or sous vide applications!
This two-pack purchase is a "no-brainer." Watch the video to see why!
As an Amazon Associate, I earn commission from qualifying purchases. The price you pay does not increase. Read disclosure here.
How to Dehydrate Food for Long-Term Storage
Why Dehydrating Food Still Works Today
Benefits of drying food: Drying is an old method that saves space and weight. It keeps most nutrients and can make flavors stronger.
Types of foods suitable for drying: Fruits, vegetables, herbs, and meats are great for drying. Popular dried foods include apples, tomatoes, herbs, and jerky.
3 Easy Drying Techniques: Sun, Oven, and Dehydrator
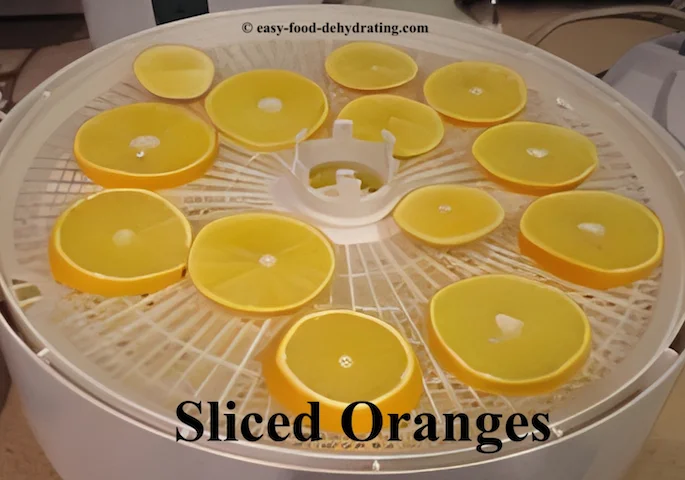
Sun drying: Good for hot, dry climates. Spread food on trays and cover with mesh to protect from bugs. Turn food regularly.
Oven drying: Use a low oven temperature (140°F) and place food on racks. Keep the oven door slightly open to let moisture escape.
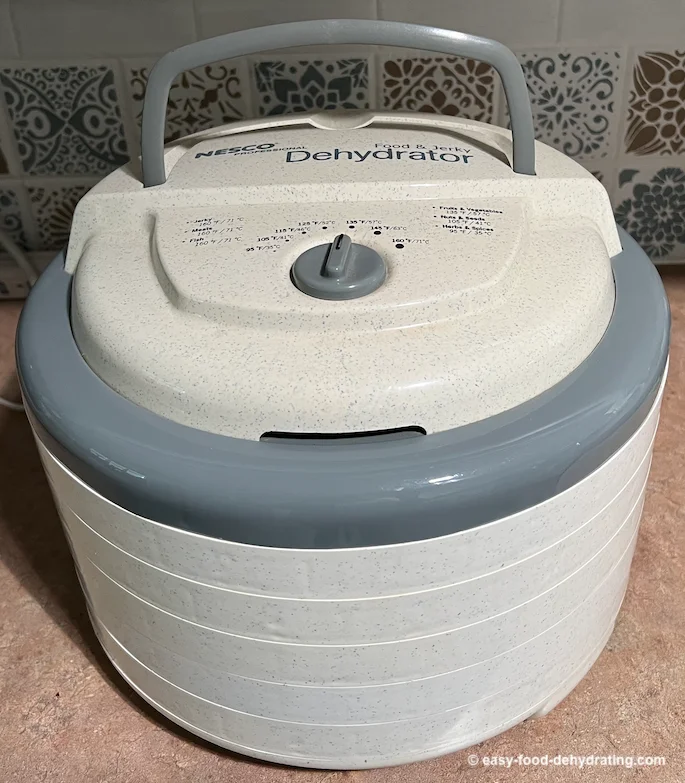
Using a food dehydrator: A dehydrator gives consistent heat and airflow. Follow the manufacturer's instructions.
💡 Tip: Outside the U.S.? Most dehydrating temps here are listed in Fahrenheit — use our quick converter to see the Celsius equivalent for your machine.
How to Store and Rehydrate Dried Foods
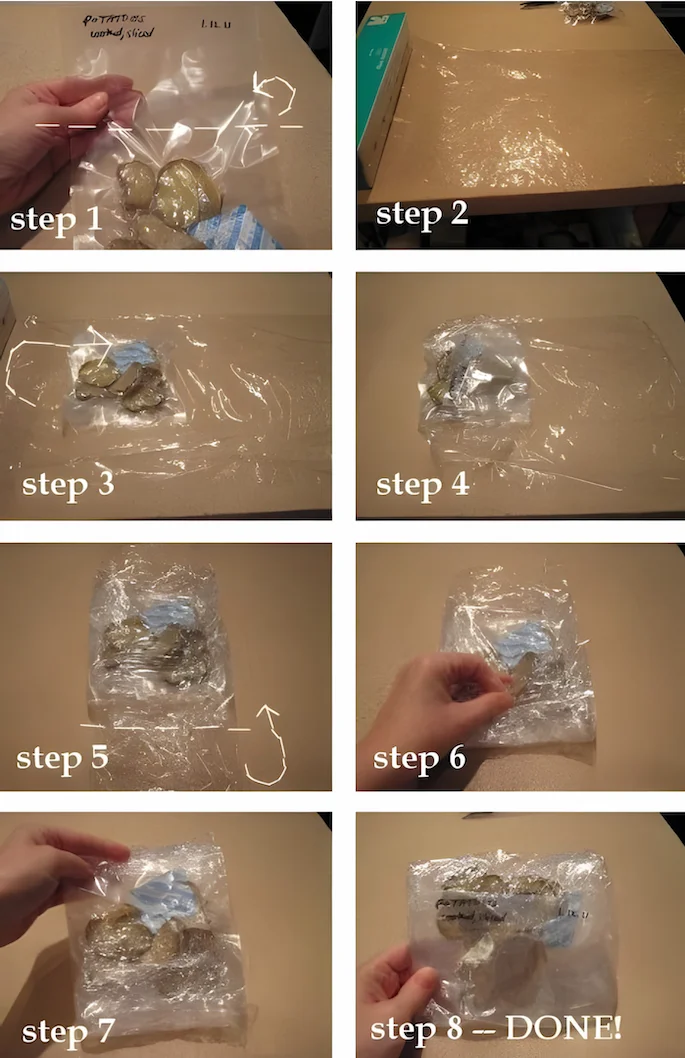
Proper storage methods for dried foods: Store dried foods in airtight containers in a cool, dark place. Use vacuum-sealer bags or Mason jars with oxygen absorbers and desiccant packets for longer storage.
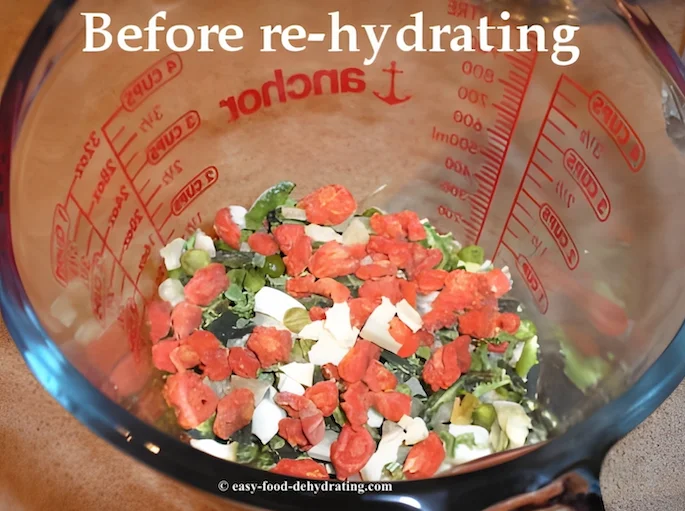
How to rehydrate dried foods for use: Soak dried foods in water or broth until they return to their original texture. Use them in soups, stews, and other recipes.
Nesco DEHYDRATORS Available on Amazon
💡 Tip: Outside the U.S.? Most dehydrating temps here are listed in Fahrenheit — use our quick converter to see the Celsius equivalent for your machine.
Nesco FD-80A Food + Jerky Dehydrator
This is a square-shaped food dehydrator, perfect for snacks, fruit, and beef jerky. White with a top black tray edge, with a white lid.
- 700 watts of drying power
- Expandable to 8 trays
- 15.25 x 10.25 x 15.63 inches (LxWxH)
- Temperature range: 95°F – 160°F
- Comes with: 1 Clean-A-Screen, 1 Recipe Instruction Book, 1 Jerky Seasoning & Cure Sample
Nesco FD-61WHC Snackmaster Encore Food Dehydrator
This round Nesco Snackmaster comes with a jerky gun kit and 5 trays. It has a very light grey body with a darker grey lid.
- 500 watts of drying power
- Expandable to 12 trays
- 13.5 x 13.5 x 9.25 inches (LxWxH)
- Temperature range: 95°F – 160°F
- Comes with: 1 Jerky Gun with 3 tip attachments, 2 Fruit Roll Sheets, 2 Clean-A-Screens, 5 Jerky Seasoning & Cure Samples, Recipe & Instruction book
Nesco FD-60 Snackmaster Express Food Dehydrator
This is the new version of mine as it has an updated lid. It's a light grey body with a darker grey lid.
- 500 watts of drying power
- Expandable to 12 trays
- 13.5 x 13.5 x 9.25 inches (LxWxH)
- Temperature range: 95°F – 155°F
- Comes with: 1 Fruit Roll Sheet, 2 Original-Flavor Jerky Spice & Cure Packets
As an Amazon Associate, I earn commission from qualifying purchases. The price you pay does not increase. Read disclosure here.
How to Ferment Food Safely at Home

What Is Fermentation and Why Is It Healthy?
What is fermentation? Fermentation is when good bacteria turn sugars into acids, gases, or alcohol. This preserves food and adds nutrients and flavor.
Health benefits of fermented foods: Fermented foods are rich in probiotics, which help your gut and immune system. They also have vitamins, minerals, and enzymes.
How to Make Sauerkraut, Yogurt, and Kefir
Basic steps for fermenting vegetables:
- Clean and chop vegetables.
- Make a brine solution (water and salt - see ratios below).
- Submerge vegetables in the brine.
- Use a weight to keep vegetables under the brine.
- Cover the container with a cloth to allow airflow.
- Store in a cool, dark place and check regularly.
Making homemade yogurt and kefir:
- Yogurt: Heat milk to 180°F and cool to 110°F. Add a yogurt starter and keep at 110°F for 6-12 hours.
- Kefir: Add kefir grains to milk and let it ferment at room temperature for 24-48 hours. Strain the grains and enjoy.
💡 Tip: Outside the U.S.? Most dehydrating temps here are listed in Fahrenheit — use our quick converter to see the Celsius equivalent for your machine.
Easy Brine Water to Salt Ratio: One rule of thumb is to use 1-3 tablespoons salt per litre (4 cups) of water.
The easiest way to calculate the exact amount of salt needed is this
simple metric calculation: To create 3% brine in 1000 milliliters (1 liter) of water: 1000 x . 03 = 30.
Source: Google
How to Store Fermented Foods and Keep Them Safe
Ensuring safe fermentation: Use clean equipment and good ingredients. Watch the process and throw out any batches with bad smells or mold.
Storing fermented foods: Store fermented foods in the fridge to slow down fermentation and keep them fresh. Use airtight containers.
How to Pickle Fruits and Vegetables at Home

What Is Pickling and Why Use It?
What is pickling? Pickling means soaking food in vinegar or salty water. This keeps the food fresh and adds a tangy flavor.
Benefits of pickling: Pickling makes vegetables and fruits taste great and keeps their nutrients. It also provides probiotics.
Quick Pickling vs. Traditional Pickling: Which to Use?
Quick pickling vs. traditional pickling:
- Quick pickling: Soaking food in vinegar for a short time, usually a few hours to a few days. Good for small batches.
- Traditional pickling: Fermenting food in brine for several weeks. This gives deeper flavors and longer storage.
Step-by-step guide to pickling vegetables:
- Clean and chop vegetables.
- Make a pickling solution (vinegar, water, salt, and spices - see ratios below).
- Pack vegetables into sterilized jars.
- Pour the pickling solution over the vegetables.
- Seal jars and store in the fridge for quick pickles or in a cool, dark place for traditional pickles.
Quantities of ingredients needed for making a pickling solution:
- 1 cup water
- 1 1/3 cup white vinegar
- 1/3 cup granulated sugar
- 2 tablespoons kosher salt
Source: Google
How to Store and Use Pickled Foods in Meals
Proper storage methods for pickled foods: Store quick pickles in the fridge and eat within a few weeks. Traditional pickles can be stored for several months.
Creative ways to use pickled foods in recipes: Add pickled vegetables to salads, sandwiches, and charcuterie boards. Use pickled fruits in desserts or as a topping for yogurt and ice cream.
How to Smoke Foods for Flavor and Preservation

What Is Smoking and How Does It Preserve Food?
What is smoking? Smoking means exposing food to smoke from burning wood. This keeps the food fresh and adds a smoky flavor.
Benefits of smoking food: Smoking makes meats, fish, and vegetables taste great and last longer. It reduces moisture and stops bacteria.
Cold Smoking vs. Hot Smoking: Key Differences
Cold smoking vs. hot smoking:
- Cold smoking: Smoking food at temperatures below 90°F. This adds flavor without cooking the food.
- Hot smoking: Smoking food at temperatures between 165°F and 250°F. This cooks the food while smoking it.
💡 Tip: Outside the U.S.? Most dehydrating temps here are listed in Fahrenheit — use our quick converter to see the Celsius equivalent for your machine.
Equipment needed for smoking: A smoker or grill, wood chips or chunks, and an easy to use thermometer.
Safe Smoking Tips and Storage Methods
Ensuring safe smoking practices: Use good wood and keep the right temperatures to stop bad bacteria. Don't use treated or painted wood.
Storing smoked foods: Store smoked foods in the fridge or freezer. Use airtight containers or vacuum-sealer bags.
How to Make Food Preservation Part of Your Life

Must-Have Items for a Self-Sufficient Pantry
Essential items for a self-sufficient pantry: Stock your pantry with preserved foods, grains, beans, spices, and cooking basics. Include canned vegetables, dried fruits, pickled vegetables, and smoked meats.
Rotating stock and maintaining freshness: Use the oldest items first. Check expiration dates and keep your pantry fresh.
Easy Recipes Using Preserved Foods
Recipe ideas using preserved foods: Make tasty meals with preserved foods, like soups, stews, casseroles, and salads.
Use dried herbs and spices to add flavor.
Tips for meal planning and preparation:
Plan meals around your preserved
foods to save time and reduce waste.
Make big batches and freeze portions for quick dinners.
How Food Preservation Supports Emergency Prep & Sustainability
How food preservation contributes to sustainability: Preserving food reduces waste, cuts down on shopping trips, and supports local and seasonal eating. It also helps you rely less on store-bought food.
Being prepared for emergencies with preserved foods: A pantry full of preserved foods means you're ready for emergencies. It gives you peace of mind and helps you take care of your family.
Learn More: Top Food Preservation Resources
Recommended Reading
- What is Canning: A Comprehensive Guide to Food Preservation
- Canning 101: A Comprehensive Guide to Understanding the Basics
Food Preservation FAQ: Your Top Questions Answered
How long can canned foods be
stored?
How long can canned foods be stored?
Canned foods can last 1–2 years in a cool, dark place. Always check for signs of spoilage like rusted lids, bulging, or leaks.
Can I freeze food without
blanching?
Can I freeze food without blanching?
You can freeze some foods without blanching, but blanching helps maintain color, texture, and nutrients — especially in vegetables.
What is the best way to store dried
foods?
What is the best way to store dried foods?
Store dried foods in airtight containers in a cool, dark place. For long-term storage, use vacuum-sealed bags or jars with oxygen absorbers and desiccant packets.
How do I know if my fermented food
is safe to eat?
How do I know if my fermented food is safe to eat?
Safe fermented food should smell pleasant and taste tangy. Discard anything with mold, a rotten smell, or discoloration.
Can I pickle fruits as well as
vegetables?
Can I pickle fruits as well as vegetables?
Yes, you can pickle fruits like apples, pears, and berries. Pickled fruits add a tangy flavor to desserts and salads.
What type of wood is best for smoking
food?
What type of wood is best for smoking food?
Use hardwoods like hickory, oak, apple, or cherry. Avoid softwoods or treated wood, which release harmful chemicals.
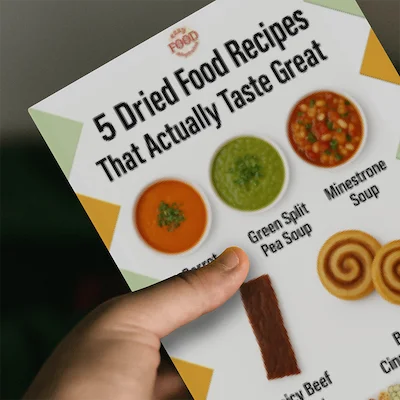
Ready to put your food preservation skills to good use? Download my free recipe guide below, 5 Dried Food Recipes That Actually Taste Great. It’s packed with simple, delicious ideas to help you make the most of your dehydrated ingredients — and keep your pantry stocked with meals you'll actually enjoy.
Grab 5 Dried Food Recipes You'll Actually Love
Don't forget to grab a copy of our all new
5 Dried Food Recipes (That Actually Taste Great)
They're my all-time favorite easy dried food meals!
Get it here right now.
For Free!
Before You Go...
If you like the content, please give me some love by clicking on the 🩷 in the lower right-hand corner (on just about all my pages). This signals to me that you find it enjoyable and useful.
And don’t forget to grab your FREE 5 Dried Food Recipes via the opt-in form — they're waiting for you! Thank you so much! (Get it here).
