Podcast Episode 12:
Holey Fruit Leathers Batman!
How to Make Hole-Free Roll-ups

Ep 12 - Holey Fruit Leathers Batman

Thanks for checking out this Podcast Holey Fruit Leathers Batman! Make Hole-Free Roll-ups


Listen:

Head on over to our Podcast Host to see a list of all our Easy Food Dehydrating episodes... or go to our hub page on this site. Please note that for your convenience, the episodes on our site contain the Podcast transcripts, too!


Read the Full Transcript, Below:

00:07
Hello, and welcome to Easy Food Dehydrating, the show that teaches you how to safely dehydrate and store fresh or frozen fruits and vegetables along with cooked meats. I'm your host, Susan Gast.

00:23
Hey. Are you tired of fruit leather holes and your roll-ups looking more like Swiss cheese than a smooth chewy snack?

You're not alone. People ask, "why does this happen?", and "how do I stop fruit leather holes from appearing?"

Did you know that holes in fruit leathers are a common frustration? But with my tips, you can prevent the holes and create perfectly smooth, hole-free fruit leathers every time.

00:51
So why do holes appear in fruit leathers in the first place?

I remember the first time I made fruit leathers, all was going well until the holes appeared. I did some research as to why and then I applied the findings.

So understanding the causes is the first step to having a hole-free fruit leather.

But the top four reasons for holy fruit leathers is uneven spreading, air bubbles, excess liquid, and fruit chunks.

Regarding the uneven spreading, thin spots on the trays dry out faster and can create holes.

01:34
So I've got a related "how to dehydrate fruit roll ups" page, and I show you a way to spread out the puréed mix on your sheets. But don't make it too thin towards the center. So go check that page out and you'll see the spreading technique.

Right. So if you still get holes, make sure the leather mix is almost the same thickness all around if you experience a holey leather.

You know, dehydrators with the center hole in the trays tend to dry out faster at the outer edges.

02:06
Regarding air bubbles: trapped air expands during drying, which leaves the holes behind.

Just like when you make cake batter to get rid of the air bubbles, bakers bang the tin, you know, the batter-filled tins on the countertops a few times to make the air bubbles rise and burst. So do the same with your trays, but do it gently.

02:31
Regarding excess liquid:

Too much moisture can cause separation and holes. So don't make them too runny. If it kinda like pours out of the blender and it's a bit thin, put it back in the blender and add some apples or something like that, or a banana to the mix. And, obviously, it depends what your fruit base is.

02:52
Regarding "smash the fruity chunks," large pieces can create weak spots that become holes. So if you're using your blender to make your fruit leather, just look for chunks of fruit that didn't hit the blades fully. So when these fruity chunks dry, they tend to contract and can leave the holes, and we don't want holes.

03:12
What we need to do is follow four steps that'll set yourself up for hole-free fruit leather success.

Number one, achieve the right consistency, which means blend your fruits thoroughly for a smooth purée. Aim for an applesauce like texture. Drain excess liquid from very juicy fruits, and you can add a thickener like ground chia seeds or even apple sauce if needed.

03:44
Number two, prepare your tray.

So you can use those specially made nonstick sheets or line it with parchment paper to prevent sticking. They've even got some great silicone trays [liners] out now that really helps in the nonstick department. Also keep your tray level for easy spreading.

04:07
Number three, spread your mix like a pro. Use an offset spatula that's bent at, like, ninety degrees, like a an elbow - can't explain it - that helps you spread things out at a uniform thickness and aim for, like, an eighth of an inch to a quarter inch thickness across the tray. Spread to the edges, obviously not over them.

04:31
Number four, eliminate air bubbles.

So like I said before, tap the tray gently on the countertop several times, or you can use a toothpick to pop any visible bubbles. So during the drying process, keep your eye on it because even with the perfect prep, issues can arise while drying your fruit leathers. So remember to set the temperature at the right temperature, and a 135°F is ideal for most fruits.

I'll include here a Fahrenheit to Celsius converter so you can convert that to Celsius.

05:10
Rotate your trays every two to three hours to make sure they dry evenly, and check it regularly, especially towards the end of the drying process. Yeah. I know the manufacturers claim that you don't need to rotate the trays due to their perfect air drying system blah blah blah, but I beg to differ. So depending on where your dehydrator fan is located, odds are the foods closest to that fan will dry out faster. Now that makes total sense. Right?

05:41

Sponsor Message
You're going to love this. Getting Susan's book, Easy Food Dehydrating is one of the smartest things you can do for your health and your budget. Not only will you save money, but you'll know exactly what goes into your recipes. Susan's book takes you from start to finish with all the recipes on her site, including her best selling “Make Your Own Dog Food” recipes for Chicken Chow and Bow Wow Beefy Chow. Learn how to dehydrate the top 14 fruits and the top 16 vegetables, along with cooked meats such as chicken, beef, and turkey. Visit Easy Food Dehydrating and get started today.

06:25
Okay. Onto troubleshooting and fixing the holes mid drying.

If you do spot holes forming, just pause the dehydrator. Make a small amount of fresh fruit purée, you know, the same as your original mixture. In fact, you could leave a tad out to one side just in case. Then carefully fill the holes using a small spoon or a piping bag, kinda like spackling drywall when you've got a big nail hole. You know, I love doing stuff like that.

Anyway, carefully fill the holes and then smooth the surface gently, then carry on drying, checking often. But the trouble with spackling up the holes with purée though is, those areas, again, will take longer to dry than the rest of it. And also the partially dried part of the leather then will get overly dry. So we're trying to aim for evenness from start to finish.

07:18
Here's some expert tips for a whole free fruit leather success.

07:23
Pick the right fruit.

Picking the right fruit for your fruit leathers, well, just follow these four suggestions.

Number one, choose the right fruits such as apples, berries, and stone fruits work well. Avoid seeds and fibers.

07:41
[Number two], strain out the seeds and fibers so you don't get weak spots.

07:45
Number three, don't over dry. The leather should be pliable but not brittle. Otherwise, it's hard to roll up.

07:52
Number four, always allow it to cool down to room temperature before handling. You know, I didn't one time, and, oh my gosh, it felt like I needed a chisel to remove it. And, again, those silicone tray liners, yeah, I will be investing in some of those.

08:11
And again, if your leathers are sticking more than you like, use a light spraying of oil next time. Not olive oil unless it's like a vegetable-y type leather, but like canola oil that's pretty flavorless. Ah, yeah. You can use coconut oil. That's a good one that doesn't taste horrible and goes well with fruit, obviously.

08:37
Okay. Now then let's break down those four points I mentioned. The reason for choosing apples and berries and stone fruits is that apples are high in pectin, which gives us a good even texture and has a neutral flavor. But the reason for berries is they're rich in flavor and natural sweetness and have a good balance of acid, sugar.

Stone fruits such as apricots, peaches, and plums also have a good balance of sweetness and acidity, plus they purée well. But regarding the seeds and fibers, if the seeds remain in the mix, they'll create hard spots and could even create a choking hazard, especially where little kids are concerned.

Fiber can be stringy, which affects the overall consistency of the leather. So, seeds and fibers have a tendency to create weak spots as our leathers dry.

09:31
Here's some fruits to avoid for fruit leathers. Most fruits do well in a dehydrator, leather-wise, but, and there's always a but... citrus fruits!

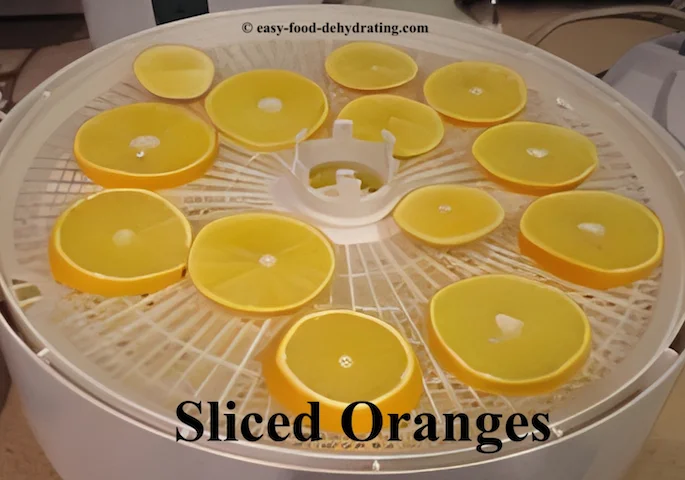
Citrus like lemons, limes, and oranges, and grapefruits have a high acidity and could make for a tart leather, and, look, let's face it, many folks like tart-tasting stuff.

I remember as a kid enjoying a hard candy called Sour Balls and another one called Pear Drops, which to me smelled like nail polish remover, but I loved those Pear Drops. Anyway, so if you're not into tartness, you'll need to add sugar, and you know the bad rap that sugar is getting, rightly so. Also, adding excessive sugar can make the leather gummy and sticky.

10:20
Avoid watermelon and other melons with high water content. Extremely high water content melons make it time consuming to dry, and they sometimes come out brittle and prone to those dreaded holes.

10:32
Bananas. Believe it or not, bananas can turn really brown and look horrible. So it's best to mix bananas in with other fruits, you know, like blend it in.

10:41
Pineapple. Pineapples contain bromelain. I hope that's how you pronounce it. It's the bromelain enzyme which messes with the setting of a fruit leather, and that can result in a sticky mess. Plus, some people are allergic to the ingredient of the bromelain.

10:59
Kiwi. Yep. They contain seeds. So if you want to use kiwi, strain the seeds out first.

11:07
And then whole berries, like blackberries and raspberries, it's those large seeds that if left in that cause the holes. Like the kiwi fruit, strain them first if you want to use these otherwise awesome berries.

11:22
Fruit leather perfection. Practice makes perfect.

Remember, creating perfect fruit leather is part science, part art. Don't feel bad if your first few attempts aren't perfectly hole-free. But anyway, when you roll them up, who's gonna see it anyway? Right? So if you follow the tips I've shared and with a bit of patience and practice, you'll be making beautiful, hole-free fruit leathers like a pro, too.

Alrighty. So happy dehydrating.

11:51
Thanks for listening and don't forget to subscribe to our podcast.

Alrighty. Bye for now.

11:59
Thanks for listening to the Easy Food Dehydrating podcast. Visit Easy-Food-Dehydrating.com for much more information on how to dehydrate food and the best way to safely store it.


Head on over to our Podcast Host to see a list of all our Easy Food Dehydrating episodes... or go to our hub page on this site. Please note that for your convenience, the episodes on our site contain the Podcast transcripts, too!

Thinking of Starting a Podcast?

Thinking of starting your own Podcast? I’m having a total blast… and Buzzsprout is here to help you get started. It’s so easy to launch a professional Podcast, and their support is second-to-none. Over 100,000 people already launched their Podcast with Buzzsprout.

They get your Podcast into every major Podcasting platform: such as Apple Podcasts, Spotify, Google Podcasts and many more. Get a great-looking Podcast website, along with an awesome Podcast player you can drop into other websites, detailed analytics, tools to promote your episodes, and much, much more!

Start today and get a $20 Buzzsprout credit when you upgrade to any plan via the link right HERE - this takes you to Buzzsprout's login-page where you can sign up for a free Buzzsprout account to get you going. This lets Buzzsprout know we sent you to them… and it helps support our show!

Buzzsprout - it's the easiest way to start a Podcast.


Before You Go...

If you like the content, please give me some love by clicking on the 🩷 in the lower right hand corner (on just about all my pages). This signals to me that you find it enjoyable and useful. Thank you so much!