What We Mean by “Dehydrate”
Here at Easy Food Dehydrating, “dehydrate” always means using an electric food dehydrator — the easy, reliable way to dry food at home.
- Home
- Old Pages New Content
Old Pages → New Content: Updated Links
You've arrived at THIS page due to you landing on an OLD LINK.
- For my old existing FAQ pages 1 through 15, consider visiting this FAQ page
- For the old Amazon Marketplace link - just go to Amazon.com :-)
- For the old videos page, they're completely gone for now while I revamp.
- For pizza-related pages: "Bread-and-Pizza," "Pizza-Take-Two," and "bread-and-pizza," along with plain old "Pizza" take note that all those forward to this link: "https://www.easy-food-dehydrating.com/pizza.html"
- For my Supmakin video demo on its video page, it wouldn't "play nice," so I deleted that page and that's why you're here. Sorry about that! But you can go see my review of the Once-For-All Supmakin slicer here
Oopsie Page
How to Grow Fruit and Vegetables for Dehydrating
(This wasn't supposed to go live, naughty page... it's NOT ready yet!)
Podcast Links
These old Podcast pages have been removed
Podcast Hub Page: Easy Food Dehydrating Podcast
Season 1
- Podcast Easy Food Dehydrating
- Podcast 10 Things You Should Know About Dehydrating Food
- Podcast 6 Steps For Dehydrating Food Safely
- Podcast Create Food Storage Space
- Podcast Dehydrating Fruit Vegetables And Meat
- Podcast Dehydrating Meat
- Podcast Difference Between Nesco And Excalibur Dehydrators
- Podcast Food Vacuum Sealer Bags And Rolls
- Podcast How To Dehydrate Food Safely Overview
- Podcast Make Your Own Dog Food
- Podcast Mylar Bags
- Podcast Oxygen Absorbers
Season 2
- How to Dehydrate Pumpkin
- Rehydrate Dried Food Safely
- Pork Dehydrating Basics
- Dehydrating Green Beans
- Kitty Cravings Cat Treats
- Oxygen Absorber Sizes
- How to Dehydrate Fruit Overview
- Dehydrate Eggs Safely
- Dehydrating Food in Convection Ovens
- Easy Food Dehydrating and Safe Food Storage
- Making Dried Food Gifts
- Use the Right Size Oxygen Absorber
Reader Submissions
- Boston Butt Pork Stew
- Daisy Food
- Doggie Biscuits
- Foodsaver V3485
- Foodsaver V2840
- Pork Tips
- Lettuce, Pea, and Green Bean Spongies
- Excalibur Dehydrator 3900
- I've Had This Dehydrator For Close To TWO Decades
- 4-Tray Excalibur
Forum Questions
- How Can I Stop My Bananas From Going Brown?
- Dried Tomatoes
- Do You Have To Peel Carrots Before Drying Them?
- Frozen Fish
Old Reader Submission Comment Forms
Pages formerly known as these shown below are not accessible any more.
- can i use yellow split peas comment form
- /fd60 comment form
- which dehydrator lasts comment form
- 4-tray model comment form
- fd35 comment form
- fd75a comment form
- ancient but still works comment form
- beef stew best cut to use comment form
- nesco fd 75a comment form
- nesco fd61p 500 watt dehydrator comment form
- nesco professional comment form
- nesco with seven trays comment form
- beef stew1 comment form
- green split pea soup in slow cooker comment form
- carrot soup1 comment form
- do you have to peel carrots before drying them comment form
- how do you vacuum air out of a mason jar comment form
- ive had this dehydrator for close to two decades comment form
- carrot cake comment form
- carrot cake recipe comment form
- debs carrot cake comment form
- dried tomatoes comment form
- 4tray excalibur comment form
- daisy food comment form
- foodsaver v3485 comment form
- how can i stop my bananas from going brown comment form
- whats the difference between freeze drying and dehydrating comment form
- excalibur dehydrator 3900 comment form
- food saver v2840 comment form
- frozen fish comment form
- lettuce pea and green bean spongies comment form
- pork tips comment form
- doggie biscuits comment form
- boston butt pork stew comment form
- 4tray excalibur
- whats the difference between freeze drying and dehydrating
- foodsaver reader reviews
- excalibur dehydrator reader reviews
Previously-Existing Links
For these pages with old existing links:
- Face Masks
- 30 Things I Love About My Mom
- Christmas Time Once More
- Christmas Losses
- Help! My Dog Will Not Eat...
- Jolly Old England
- Survival seeds
- The Raw Food Revolution
- Got taxes
- Food glorious food
- Betty's vegetables
- Get serious
- Solar made easy
- Cooking in a crisis
and
- Forget the flowers...
all those pages were completely removed and that's why you landed here. Sorry about that!
Extra Content from Old Forms
On some pages, I have a form where you can send in your comments pertaining to what you've read on that page.
Sometimes, for some strange reason, they show as links that are inaccessible. I will try to figure out why, but at the moment, it's above my pay grade.
Questions? Contact Me.
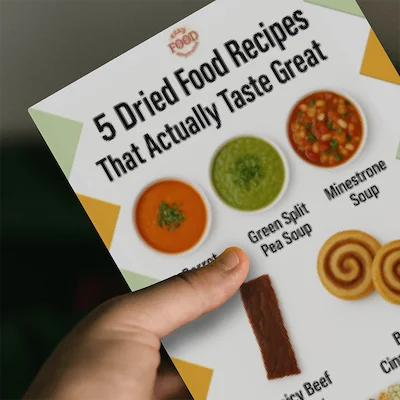
Get 5 Dried Food Recipes You'll Actually Love
Here's where you can get your copy of our all new
5 Dried Food Recipes (That Actually Taste Great)
They're my all-time favorite easy dried food meals!
Get it here right now.
For Free!


