- Home
- How to Store Dehydrated Food Safey for Long Term Storage
- Food Vacuum Sealer Bags
Food Vacuum Sealer Bags
For Storing Dehydrated Food
Food Vacuum Sealer Bags
For Storing Dehydrated Food

Susan Gast | Author and blogger at Bored Boomers, Beesville Books, A New Sober You and Easy Food Dehydrating
What do you need food vacuum sealer bags for? Good question.
First, you need good bags for sealing and the proper storing of your dehydrated food.
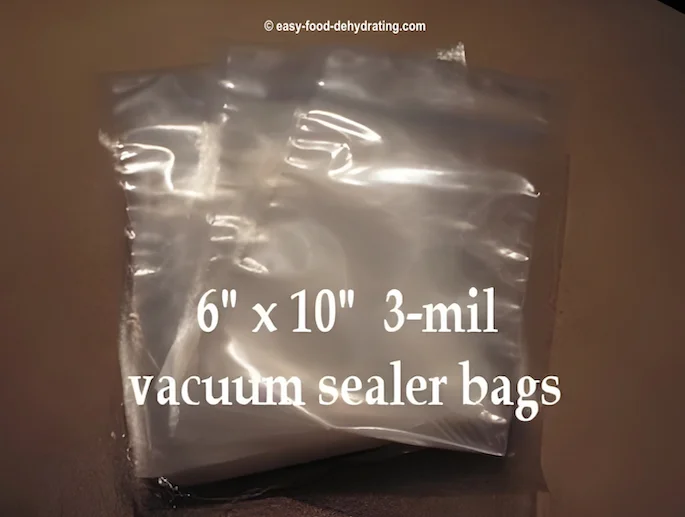
You can purchase food vacuum sealer bags in varying sizes, and thicknesses. Make sure you purchase ones that are at least 3-mil thick. Any thinner than 3-mil ... and you may get some brittle foods puncturing your bags after the vacuuming! And we don't want that to happen.
The size of the vacuum-sealer bags I use are 6" x 10" which are PINT size bags, shown in the above image. Recently, I've upped my game and have purchased rolls so I can make "custom-size bags."
Here are the most commonly used sizes of food vacuum-sealers and bags:
FoodSaver Food Vacuum Sealer Machines Available on Amazon
The FoodSaver machines remove air, one of the main causes of mold and food spoilage - and they create an airtight seal to lock in freshness.
NOTE:
The FoodSaver 4800 Series: An all-in-one vacuum sealing system with built-in handheld sealing for bags and containers. Ideal for families and bulk buyers.
Helps keep food fresh longer.
Comes complete with a starter kit that includes an 11" x 10' heat seal roll, (3) quart heat seal bags, (2) gallon heat seal bags, and an accessory hose, so you'll soon be on your way to keeping your food fresh, eliminating waste, and saving money.
The 2-in-1 Automatic Vacuum Sealing System helps keep
food fresh longer.
One FoodSaver 2-in-1 appliance does it all: automatic bag detection and vacuum sealing mean two quick and easy steps to seal and save, and the built-in handheld sealer eliminates the need for additional attachments when sealing zipper bags and containers.
FoodSaver 8" x 20' rolls, 6-pk
FoodSaver GameSaver 8" x 20' Vacuum Seal Long Roll with BPA-Free Multilayer Construction
- Keep game and fish fresh up to 5x Longer with FoodSaver GameSaver 8-inch rolls.
- Create custom-sized bags - simply cut a piece to your desired length, seal one end, fill, and then vacuum seal.
- 8" x 20' rolls
- BPA-free
- Pack of six rolls
FoodSaver 1-Quart Food Storage Sealer bags
- Constructed of durable yet pliable material that creates an airtight barrier around foods, extending freshness and locking in flavors
-
Quickly and easily portion food
from bulk shopping or when storing leftovers.
- BPA-FREE MATERIAL: Safe for storing raw and cooked foods, it's also freezer, refrigerator, microwave, and boil-safe
- 1-quart size precut bags, 44-count
FoodSaver Pint-size Food Storage Sealer bags
- Constructed of durable yet pliable material that creates an airtight barrier around foods, extending freshness and locking in flavors
-
Quickly and easily portion food
from bulk shopping or when storing leftovers.
- BPA-FREE MATERIAL: Safe for storing raw and cooked foods, it's also freezer, refrigerator, microwave, and boil-safe
- 1-pint size precut bags, 28-count
As an Amazon Associate, I earn commission from qualifying purchases. The price you pay does not increase. Read disclosure here.
If you want to save money, try these Weston brand food vacuum sealer bags for a 100-count pack. Note that they are 3 mil thick! These are the ones I use.
2 Ply 3mm Thick, for NutriFresh, FoodSaver & Other Heat-Seal Systems, for Meal Prep and Sous Vide, BPA Free, 6" x 10" (Pint), 100 count, Clear
As an Amazon Associate, I earn commission from qualifying purchases. The price you pay does not increase. Read disclosure here.
For Food Vacuum-Sealer Bags, Thicker is Better
The food vacuum sealer bags are smooth on the outside but only ONE side (on the INSIDE) - has textured bumps for easy air removal.
And no, it doesn't matter which side up the bags go on the vacuum sealer machine!
Make sure you select good food vacuum sealer bags for storing your dehydrated food—SAFELY! Thin bags can puncture easily.
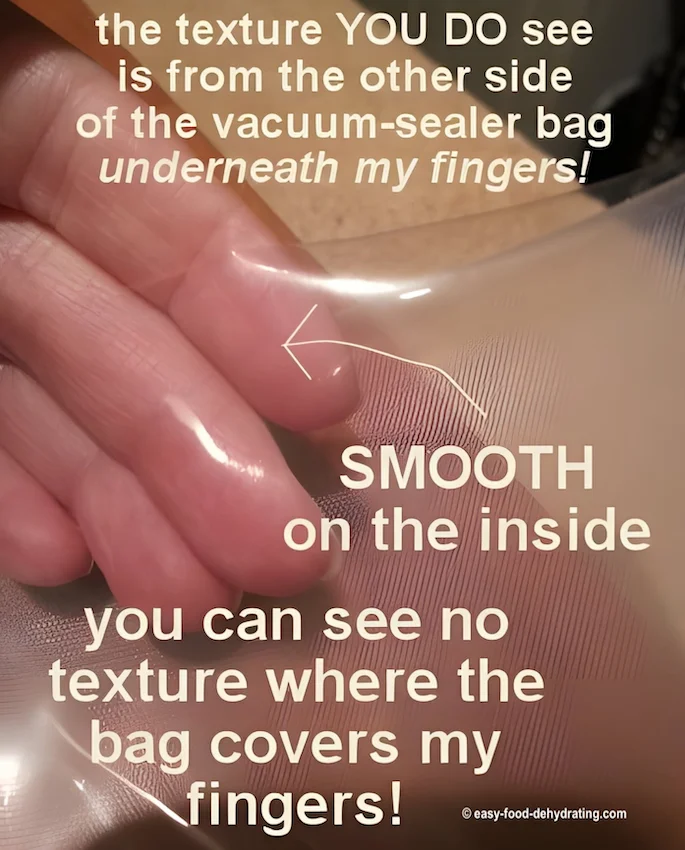 The upper part of the bag is smooth, both sides
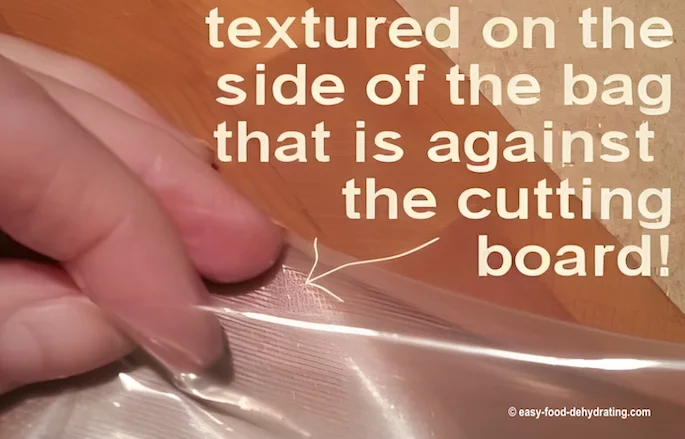 The lower part of the bag has textured bumps on the INSIDE where my middle finger is.
Just a Quick Note About Mylar Bags...
Mylar Bags Are Smooth... So What? Read On!
Mylar Bags Are Smooth...
So What? Read On!
This was brought to my attention by my Realtor-friend, Bev Miller, who was trying so hard to vacuum seal her Mylar bags.
She discovered it won't work because the Mylar bags' surface is SMOOTH! She's so smart!
You see because both interior sides of the Mylar bag are smooth (just like its exterior), they just clamp together tightly and you can't really draw the air out.
Food vacuum sealer bags, however, have textured bumps on one of the interior sides of the bag so you CAN draw the air out!
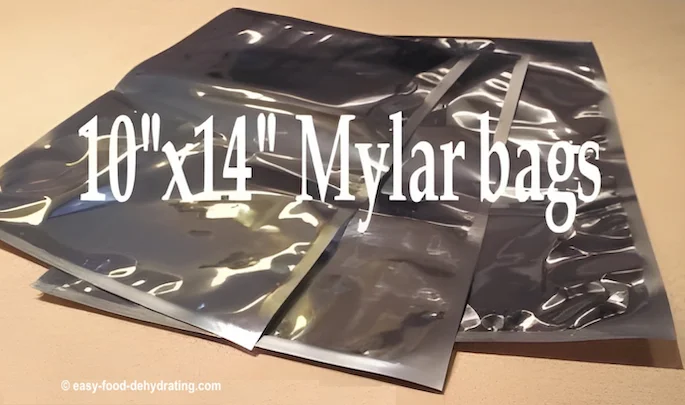
Mylar Bags - 1 Gallon Size at Amazon
Dry-Packs 1-Gallon ShieldPro Mylar Bags
- 10" x 14" Dry-Packs ShieldPro Mylar Bags
- Includes 60x 300cc Oxygen Absorbers (in packs of 20)
- 10" x 14" Genuine Mylar Bags for Long-Term Food Storage
- Pack of 50
- No oxygen absorbers included
* As an Amazon Associate, I earn from qualifying purchases.
The price you pay does not increase.
PLEASE NOTE:
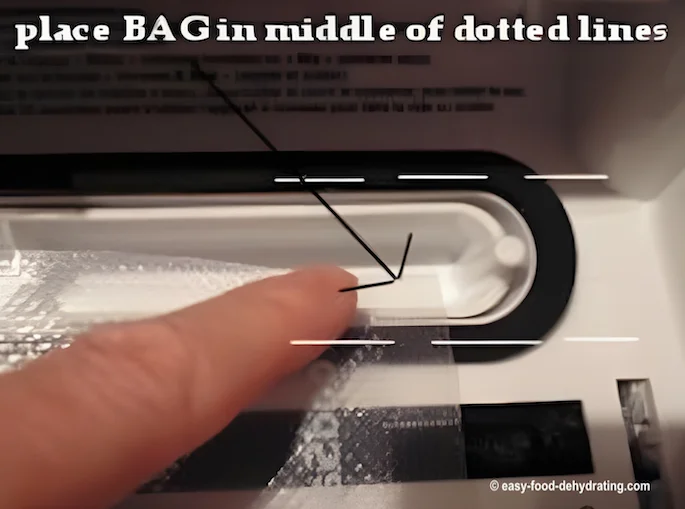
We don’t VACUUM the air OUT of
the Mylar bags,
but we DO use the sealing element
of the Food Sealer
machine to seal the Mylar bags.
The Mylar bags are simply containers for
two, three,
or four of our previously
vacuum-sealed packages of dehydrated food.
PLEASE NOTE:
We don’t VACUUM the air OUT
of
the Mylar bags, but we
DO use the sealing element
of the Food Sealer
machine
to seal the Mylar bags.
The Mylar bags are simply
containers for
two, three,
or four of our previously
vacuum-sealed packages
of dehydrated food.
Please read more about Mylar bags.
...Back to the Food Vacuum Sealer Bags
We Need the Bumpy Texture!
As mentioned earlier, we need the textured side of the food vacuum sealer bags to allow the air to be drawn out! :-) Without these tiny textured bumps, it's pretty much impossible to draw the air out.
DON'T forget to add your oxygen absorber
to the bag before drawing the air out!
DON'T forget to add
your oxygen absorber
to the bag before
drawing the air out!
When the bag has been vacuumed, it's still clamped tightly inside the FoodSaver machine, so don't worry about air making its way back inside the bag - after vacuuming, it then seals the bag. The addition of the oxygen absorber draws out any smidgens of 'stray' oxygen still lingering inside the bag.
A NOTE from Nancy in NC:
I get the 11-inch by 16-feet rolls and cut the material to make the size bag I want.
I order directly from foodsaver.com and get the GAMESAVER rolls, individual rolls, or the 6-pack.
I asked about the thickness and was told 4-mil, then I said they ought to include that bit of information in the item description.
Right now, the bags are listed under "heavy duty". ALSO: See vacuum-sealer rolls
Fill Your Bags Easily With a Canning Funnel at Amazon
- Wide Mouth Plastic Funnel
- Green
- 4.75" (12cm)
- Perfect for Canning
As an Amazon Associate, I earn commission from qualifying purchases. The price you pay does not increase. Read disclosure here.
To aid in filling of my bags, I use a canning funnel. They are inexpensive and come in very handy for filling your plastic vacuum bags or Mason jars.
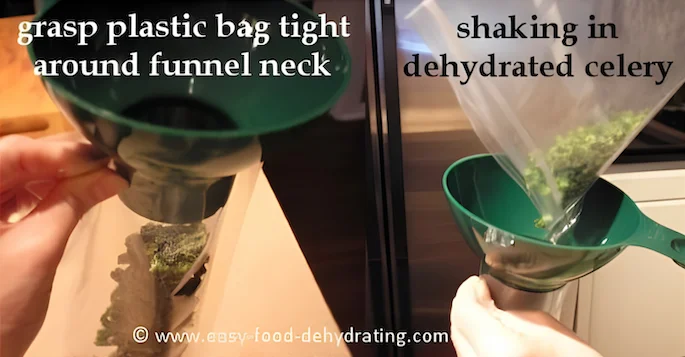
See the two side-by-side photos above. It shows how best to grasp the bag using your thumb and index finger and hold it tight around the funnel base. With a bit of practice, you'll soon get the hang of it! It makes filling your jars and bags "a breeze."
NOTE:
After vacuuming our bags, I pull out a 2ft length (approx.)
of plastic wrap. I then wrap the vacuum-sealed package in it!
Follow the
optional plastic wrap guide here.
NOTE:
After vacuuming our bags, I pull out a 2ft length (approx.) of plastic wrap. I then wrap the vacuum-sealed package in it! Follow the
optional plastic wrap guide here.
A Note from Paul Bee
This note is from Paul Bee, a regular visitor to Easy Food Dehydrating. He'd written via Facebook to say that he uses his vacuum food sealer to seal up his potato chips! I had to ask how he does that without crushing the chips?!
He said "I don't actually vacuum out the air, just use the seal-function-only of the food vacuum sealer. After eating my chips, I cut the bag to just about half, eliminating as much of the air as possible. I then place the bag edge on the heat seal and seal it up! My chips will stay fresh for up to 45 days!"
Apparently, Paul is one who can contain himself around potato chips. A bag wouldn't last more than an hour around me! LOL
Thanks for stopping by "Food Vacuum Sealer Bags," I hope you learned a lot from it, especially the smooth and textured side of them and why they are manufactured that way (so the air can be drawn out!)
Don't forget to grab your free Six Simple Steps eBook! It’s packed with tips for dehydrating everything from fruits and veggies to dog treats. Get it here.
Before You Go...
If you like the content, please give me some love by clicking on the 🩷 in the lower right hand corner (on just about all my pages). This signals to me that you find it enjoyable and useful. Thank you so much!


